Your cart
There are no more items in your cart
Today we will give you all the information you need to renew and line an old stool, giving it a new life and a new style. Restoring a stool with a creative style, will give you the possibility to integrate your creation in your home furnishings, without disfiguring, indeed enhancing the style and design of your interior.
Very often it happens to empty an old wine cellar and find curious objects and furniture, which with the joints of restoration, can have a new life inside our home. This is the case of the stools: these furnishings can be completely renewed with small operations that will involve a minimum expenditure of money and energy.
So follow our advice carefully, to learn how to renew a stool in the best way with DIY and creative recycling.
How to line a round stool
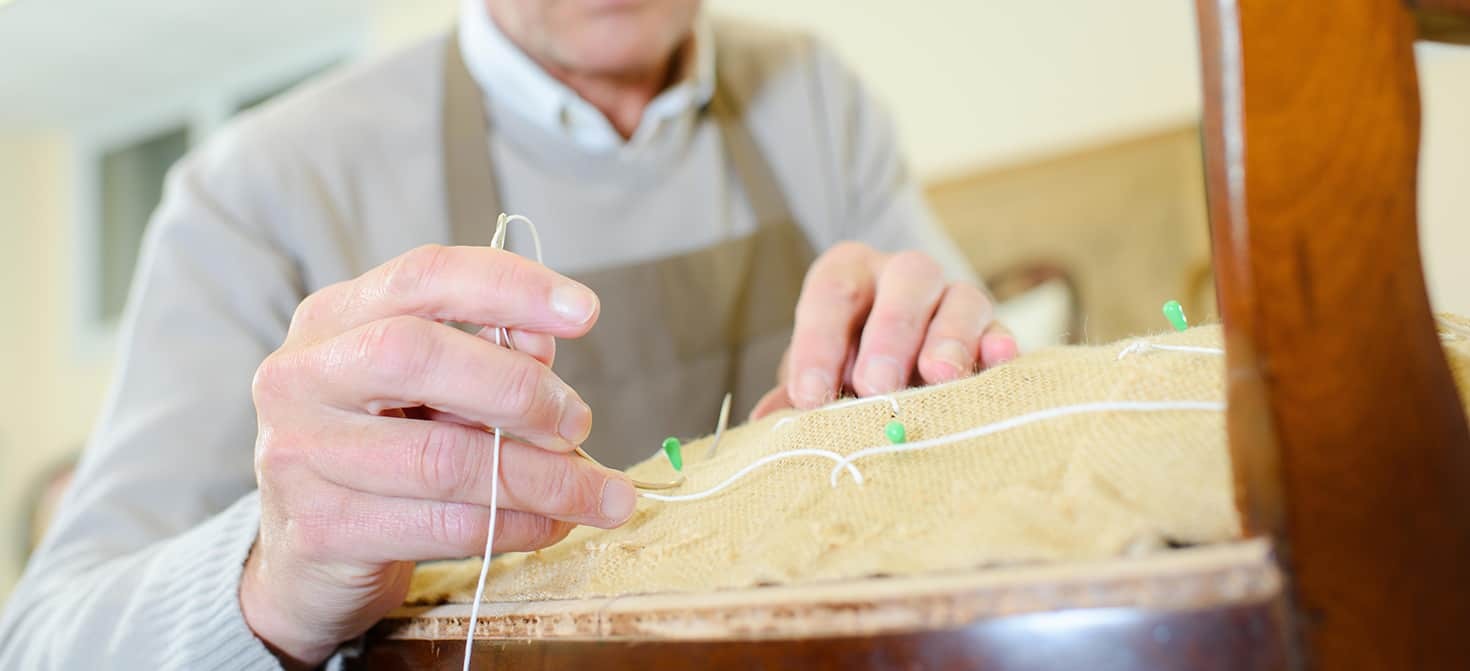
The best way to renew a stool is certainly an intervention on the seat, which will include the provision of a lining. The best way to cover a round stool is to use the trimming technique; let's see how to proceed.
To make the lining of a round stool using the trimming technique, you will not need any special skills or abilities, simply pay attention to details. To line your stool you will need some upholstery fabric, some pins, and finally glue. You can get all the necessary material from a classic DIY or DIY shop.
For the choice of fabric, our advice is to choose a pattern suitable for this type of furnishing accessory: you can opt for floral patterns characterised by particularly light colours; choose the pattern and colour of fabric that suits you best and that you consider suitable for lining a stool. Once you have procured all the necessary material to make the lining, you can start the work. The execution will involve a not difficult and intuitive procedure: it will be enough to be in possession of all the necessary tools for the trimming. By paying attention and following all the instructions, you will certainly obtain absolutely satisfactory results.
The first operation you will have to perform will be the cutting of the fabric. After the cut, you can start to try out crossings of trimmings on the surface of the stool seat. In this operation you can help yourself with the help of a few pins. Then proceed with the fixing of the fabric with the staples of the gun (the excess fabric will have to be cut with scissors and removed).
Then you will need to glue the trimmings in a defined way, avoiding smearing on the fabric. At this point you will also need to glue one round of trimmings onto the staples. Thanks to the lining with trimmings you will have created a new style of furniture, ready to take part again in your home furnishings. Obviously, if you are not an expert in this technique and you are trying your hand at trimming for the first time, you may find the lining operations difficult at times. However, with a little experience and practice, you will acquire perfect manual skills and efficiency.
Other techniques for lining a stool
In addition to trimmings, there are other techniques for lining a round or square stool. You can also decide to make a DIY padded stool. The easiest way to cover stools is to use raw fabric; you will need to measure the seat area of the stool, regardless of whether it is round or square in shape. Once you have carefully taken the measurements, you will have to cut the fabric and fix it on the surface of the stool with the help of a stapler.
To ensure that your stool is more comfortable and comfortable to sit on, you can decide to place a layer of wadding, or another type of material that you can have an upholsterer recommend.
If you are particularly creative and skilled in transferring images onto the fabric, you can let your imagination run wild and create the design and decorations you prefer for the seat of your stool.
How to restore a wooden stool
If you have found an old wooden stool in your cellar or attic and the idea of restoring it has crossed your mind, it is certainly an excellent idea; restoring a wooden stool is the best way to upgrade an object so that it can take part again in your home furnishings. It is not a complex work and with a bit of attention and method you can obtain excellent results.
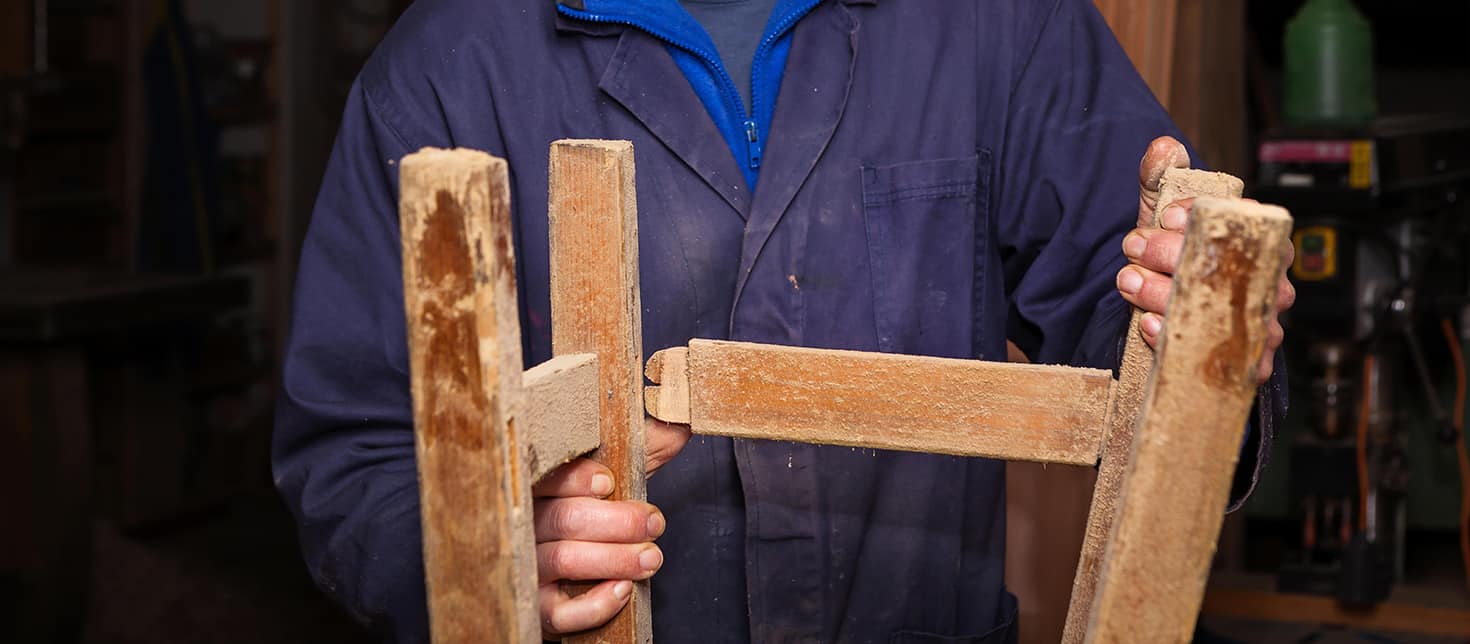
To restore a wooden stool, it will first of all be necessary, also in this case, to have all the necessary and indispensable tools for this type of work. For this purpose you will need particularly soft brushes, latex gloves, sandpaper, newspaper sheets, double adhesive tape and finally a jar of black paint and a jar of coloured paint.
You can also find the materials at a DIY or DIY shop. Once you have found all the materials needed to restore your wooden stool, you will need to start by cleaning it thoroughly with a damp cloth. Carefully remove any residue and traces of dirt. Then carefully sand the surface of the stool using sandpaper. Our advice at this stage is to use fine-grained sandpaper: a very thin sandpaper.
Once the abrasion work is finished, you will need to apply the first coat of paint to the surface of the stool. The first varnish you will have to apply on the wood of the stool will be black. After you have let the black varnish dry, you can apply the colour of your choice. Pass the second varnish, creating abstract wavy lines, in order to create a pleasant visual effect, with a black background and interesting lines of another colour. Let the second varnish dry and the work will be finished.